Delegate Application Creation for Non-Admininistrator accounts
The Web Deployment Tool provides a way to delegate application creation to non-Administrator Windows users or IIS users. This blog covers how to configure this particular delegated setting. If you have not yet set up some users, or are not familiar with remote administration, I highly recommend going through this walkthrough: http://learn.iis.net/page.aspx/159/configuring-remote-administration-and-feature-delegation-in-iis-70/ before trying out these steps.
Server Admin Steps
1. Install the Web Deployment Tool (MSDeploy)
- Use the Web Platform Installer (can be found here: http://www.microsoft.com/web/downloads/platform.aspx)
- Run and choose Web Deployment Tool 1.0 and click Install. This will also pull in any dependencies you don’t already have on your system.
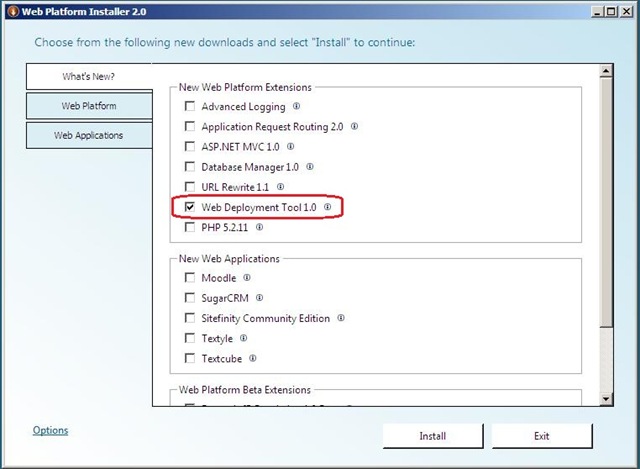
NOTE: This might take a while if you are missing a lot of dependencies (particularly the Windows Installer 4.5 – as this may require a restart)
2. Launch Inetmgr
- Click Start and type inetmgr. Press Enter.
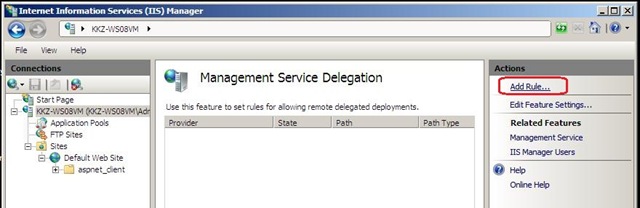
3. Open Management Service Delegation feature UI
- Select the server node and double-click the Management Service Delegation icon (in the Management group)

NOTE: if you see these warnings:
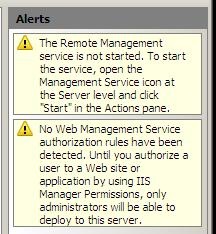
This means you need to do 2 things (but they may be done after setting up rules, if you prefer):
- Start WMSvc with remote connections allowed
- Set up some IIS Manager Permissions.
There is information about doing this here: http://learn.iis.net/page.aspx/159/configuring-remote-administration-and-feature-delegation-in-iis-70/
4. Make a rule to allow marking folders as applications
- Click the Add Rule… task in the Actions pane
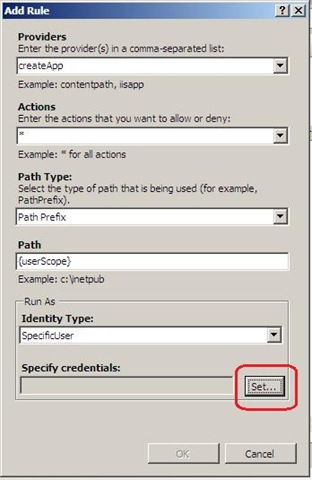
- Choose the Mark Folders as Applications template and click OK
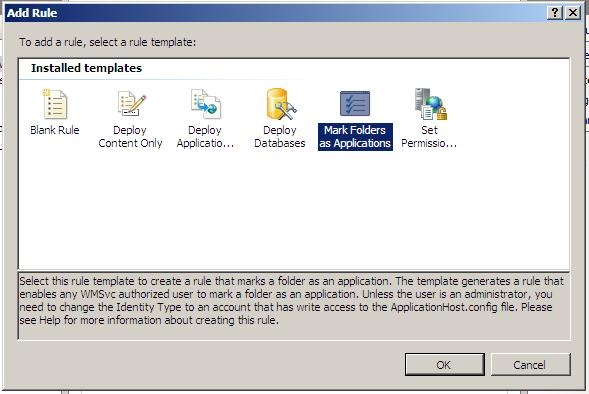
- Set the Run-As identity to an account that has write permission to applicationHost.config (such as an Administrator account)
- Click Set button under Specify credentials:
- Enter user credentials
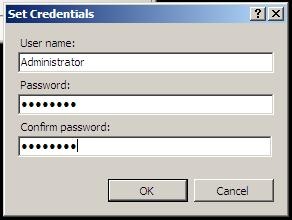
- Click OK
- Click OK to finish creation of the rule
5. Add a user to the rule
Note: this dialog will pop up automatically when you create the rule, but you can add users at any time by selecting the rule and clicking the “Add User to Rule…” task
- Add a specific Windows user, user group or IIS User. You may also make this rule for all users (*) and the {userScope} path will limit each user to the specific sites/apps they have IIS Manager Permissions for – see section Configure IIS Manager Permissions for a Site or an Application here for more information on this step http://learn.iis.net/page.aspx/159/configuring-remote-administration-and-feature-delegation-in-iis-70/ )

- Click OK
6. Add additional rules if you want to allow additional user actions (such as the ability to add content, set ACLs, or access databases) – see last section on this page.
Note – this rule ONLY allows the users to right-click an existing folder and mark it as an application – other rules are probably desired. See the bottom of this article for some common rules.
Client (non-Admin) steps
1. Launch inetmgr
Note: this may be done either from a remote computer or locally. If remote, the remote computer must also have MSDeploy installed in order to use the MSDeploy UI features.
2. Connect to the user’s site (or app)
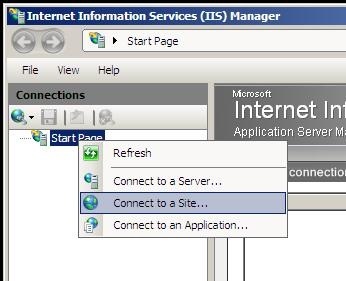
- Right-click on Start Page and choose the Connect to a Site… option
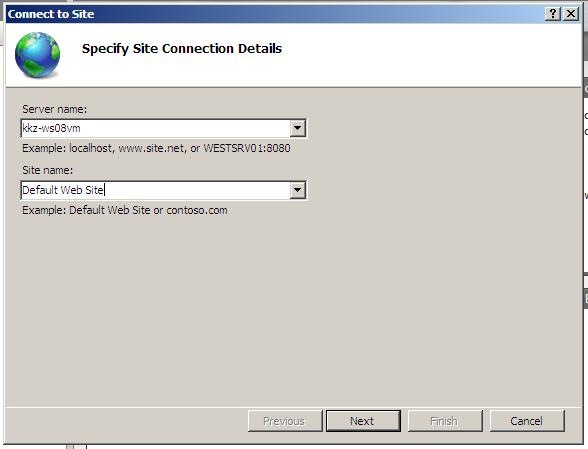
- Type in the server name and site name – click Next
- Type in user credentials and click Next

- You should get to a “Created a new connection successfully.” screen. Click Finish.
3. Expand the site node
4. Right-click a folder
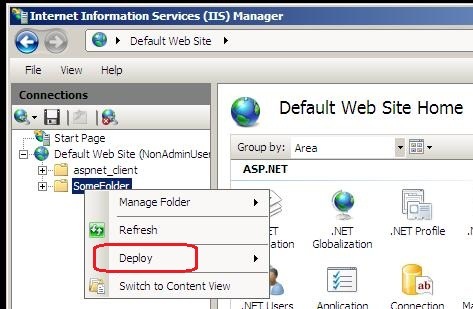
Note: if you do NOT see the Deploy option, then most likely issues are:
- MSDeploy UI component is not installed on the computer
- There are no Management Service Delegation rules
- This user has not been added to any Management Service Delegation rules
5. Select the Deploy > Convert to Application option

Note: other options would appear under Deploy if other rules were specified, such as Delete Folder and Content or Recycle. See the Common Rules section below for a few basic rules to try out.
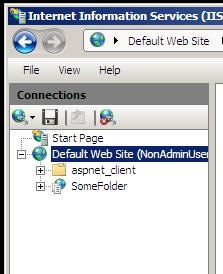
6. Notice that the folder has now marked as an application (you can tell by the updated icon in the tree view)
Some Common Rules to Get Started
This shows the values for some common rules as they would appear in the administration.config file (%windir%\System32\inetsrv\config\administration.config). The rule just created for createApp has been bolded:
<system.webServer>
<management>
<delegation>
<!–This is the “Deploy Applications with Content” rule, with all the template defaults. It allows users to add/delete files to locations they have IIS Manager Permissions for AND appropriate ACLs on the physical directories–>
<rule enabled=”true” providers=”contentPath, iisApp” actions=”*” path=”{userScope}” pathType=”PathPrefix”>
<runAs identityType=”CurrentUser” />
<permissions>
<user name=”*” isRole=”false” accessType=”Allow” />
</permissions>
</rule>
<!—This is the “Set Permissions for Applications” rule, with all the template defaults. It allows users to set ACLs to locations they have IIS Manager Permissions for AND appropriate ACLs on the parent physical directories–>
<rule enabled=”true” providers=”setAcl” actions=”*” path=”{userScope}” pathType=”PathPrefix”>
<runAs identityType=”CurrentUser” />
<permissions>
<user name=”*” isRole=”false” accessType=”Allow” />
</permissions>
</rule>
<!—This is the “Mark Folders as Applications” rule, using the template defaults. The runAs identity was set to a local Administrator account to allow non-administrators to mark folders as applications if they are in a path the user has IIS Manager Permissions for. This rule was the focus of the walkthrough above. –>
<rule enabled=”true” providers=”createApp” actions=”*” path=”{userScope}” pathType=”PathPrefix”>
<runAs identityType=”SpecificUser” userName=”Administrator” password=”[enc:RsaProtectedConfigurationProvider:jAAAAAECAAADZgAAAKQAAKv+vnsskEdvc7c3Q2tcaJGVbvKW0urtCC8QayxZfYyGVjKrxQKQTob7T5z7ESM/3Zm0mPhIut033tWpyNJ+As4N8H5Wh/w31327eaxe+C6NLK2zmHY978A0aHpqcafcZ7K7YIaGGEem/Up0xa2Jf/LXJt77vLJUkumwGOlO3Dw9NGYGIyj8zk6lHsFQPoU0SHykWhrnMCp12uzFCUN4fYw=:enc]” />
<permissions>
<user name=”*” isRole=”false” accessType=”Allow” />
</permissions>
</rule>
</delegation>
</management>
</system.webServer>
Why do all these rules use {userScope} for the default path?
This makes your job easier by automatically limiting the users to areas you’ve given them permission to using IIS Manager Permissions – which are stored in the same administration.config file. You can see in this sample administration.config section below that both a Windows user (A_Windows_User) and an IIS user (An_IIS_User) are authorized to access Default Web Site – so the {userScope} in the above rules would limit them to altering items under Default Web Site. (Note that for reading/writing content under Default Web Site these accounts will also require you to grant ACLs on Default Web Site’s physical directory. There’s some more information on how to do this here: http://blogs.iis.net/krolson/archive/2009/11/04/using-iis-manager-accounts-for-web-deployment-tool-msdeploy-delegation.aspx – for Windows users just use the user name instead of Local Service)
<system.webServer>
<management>
<authorization defaultProvider=”ConfigurationAuthorizationProvider”>
<authorizationRules>
<scope path=”/Default Web Site”>
<add name=”IISSBA149\A_Windows_User” />
<add name=”An_IIS_User” />
</scope>
</authorizationRules>
</authorization>
</management>
</system.webServer>
2 Comments
צימרים בצפון
thanks a whole lot this site can be formal and also informal
פרסום צימרים
thanks a great deal this excellent website will be conventional in addition to simple